Hiking the Himalayas : Poonhill
Mountains hold a certain magic – the towering behemoths have a tight grip on people’s hearts. People naturally just love the mountains. I am personally very guilty of this. Ever since I stepped foot in the Canadian Rockies , I became a victim amongst many others of its many charms. So it is no surprise I have eventually found myself hiking deep in the Annapurna Conservation Area surrounded by the stone giants known as the Himalayan Range. It is also no surprise to me at all that I have found myself staring at the peaks and swearing to myself I will climb and conquer those summits one day.
…But I’m getting ahead of myself …
This is about a very popular hike in the Pokhara area – the infamous Poonhill trek – and what it takes to legally hike here, what the trek is like, the quality of the trails, and how much it all cost us. As a preface – my partner and I did this trek all by ourselves, during the winter of 2025 when the days were dry, the nights were cold and the mountains calling our names. The season drastically changes the environment and many factors that come with it such as weather, how busy it is, the prices, the traffic, the sights, and so much more – so while reading this guide, please make sure to consider this very important factor.
Costs and Required Documents
As writing this, on February 24th 2025, 1 USD = 137 NRs or 1 CAD = 100 NRs
Trekking Permit – Trekkers’ Information Management System (TIMS) permit is required to go hiking in this area. For two people, we needed both passports and two “passport-sized” photos. If you were to go to the Immigration center in Pokhara, it costs about 3000NRs each permit. We personally went ahead and did it with the hostel that we were staying at – Pokhara Backpackers Hostel. They were licensed to do it all in their office. We did not have any “passport sized photos” so they took it for us with their phones. They took care of all the process, all we had to do was pay an extra 500NRs and in total of 7000NRs for two permits. The process was seamless, easy and quick. They also mentioned that only some businesses are licensed to do this and that the government is thinking of changing and modernizing the whole process. I’d highly recommend getting your permits here as it was super easy and convenient.
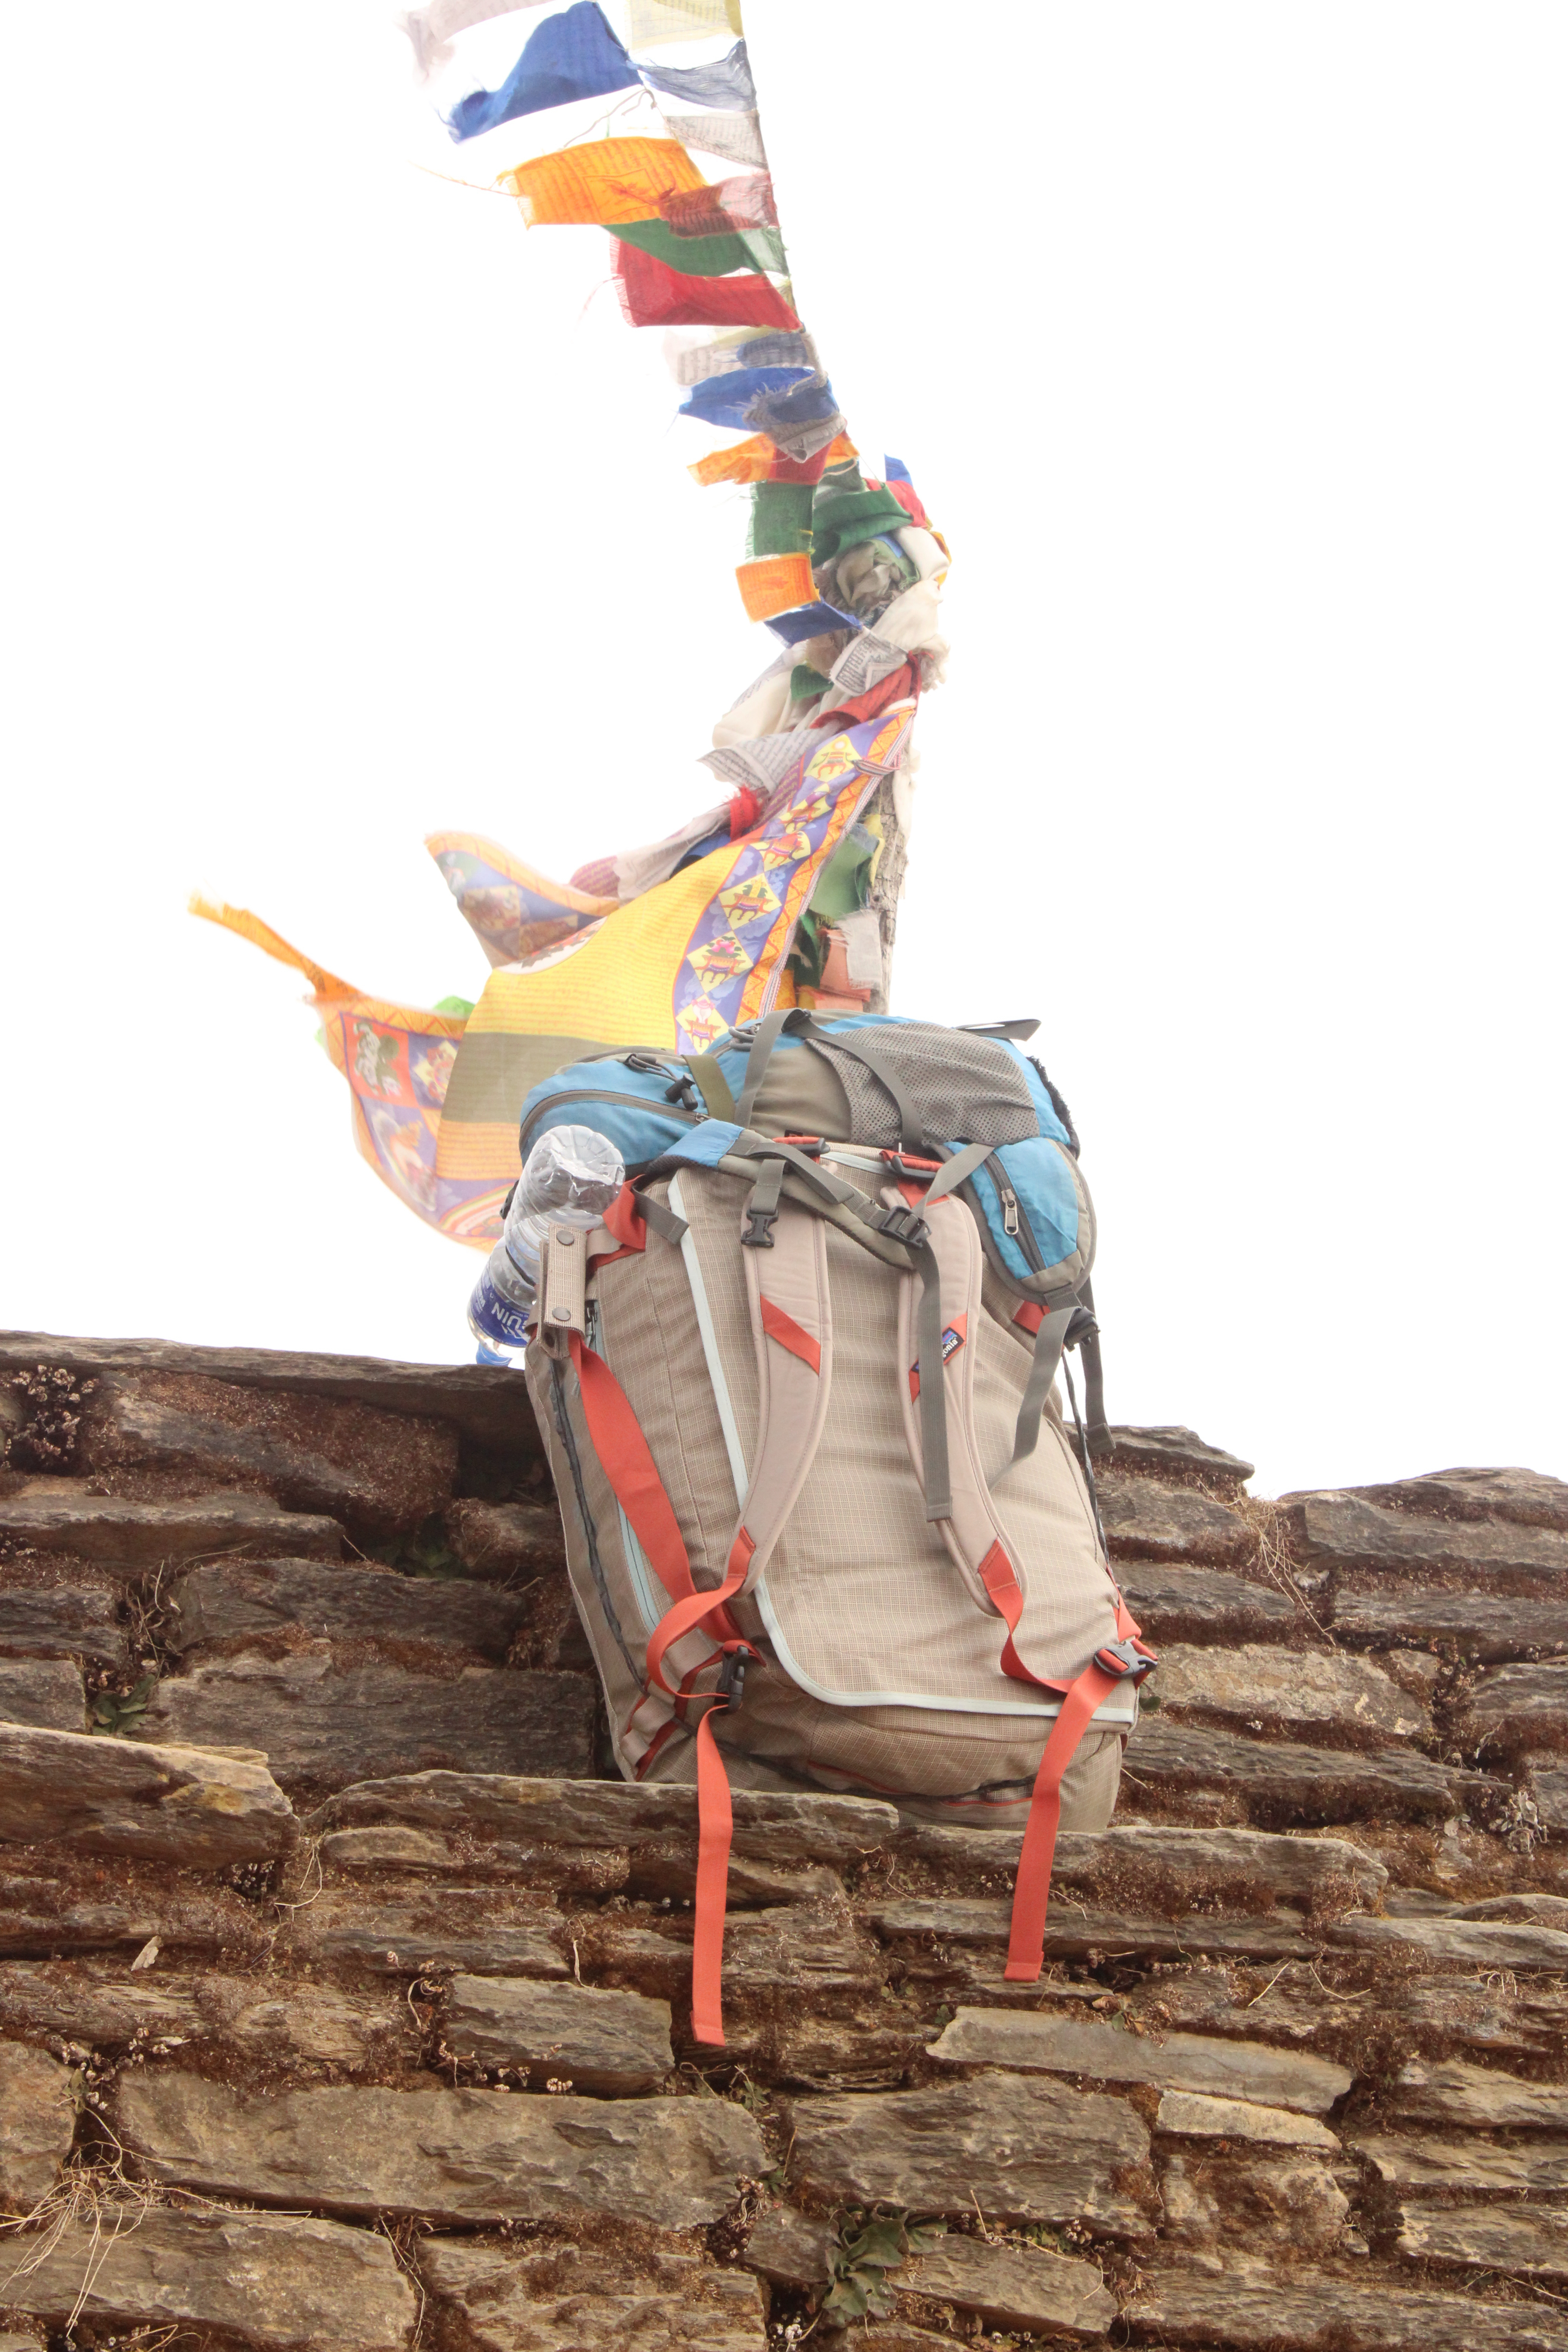
Rentals – Some travellers might want to look into rentals. Rentals are convenient as you would not have to commit to buying a full item with a full price. Rent what you need and depending on the season, on the type of trek, on the length of the trek and the altitude intended, equipment can vary. Since I needed shoes this time around (I had been travelling south east asia with just flip flops) I decided on buying new Humto shoes – 6000NRs. It usually costs somewhere around 100-200NRs per day per piece of equipment. For example, we rented a hiking bag, a pair of hiking poles, a down jacket and hiking pants. We rented 4 pieces of equipment at 200NRs per day = 800NRs per day. We also bought some chlorine tablets for purifying water – 50 tablets – 300NRs. Be prepared to also put in a deposit for the rentals.
Transportation – From Pokhara to the trail head (Nayapul), we were quoted a private car for 3500NRs. To go another 3km to Birethanti, it costs an extra 500NRs. There are also public busses that costs astronomically way cheaper (450-750NRs) but these take longer, are less comfortable and stop frequently. We ended up choosing to spend 7000NRs for a private hired jeep to pick us up from our hostel in Pokhara all the way up to Ulleri. From Ghandruk to Pokhara, there are bus options for as little as 450 NRs. There are also shared jeep options for 750 NRs but these are usually filled to the brim with other passengers. We ended up hiring a local man with a jeep along two other trekkers to take us to Pokhara. To hire him, we ended up spending 5000NRs – split into 4 was 1250 NRs each person.
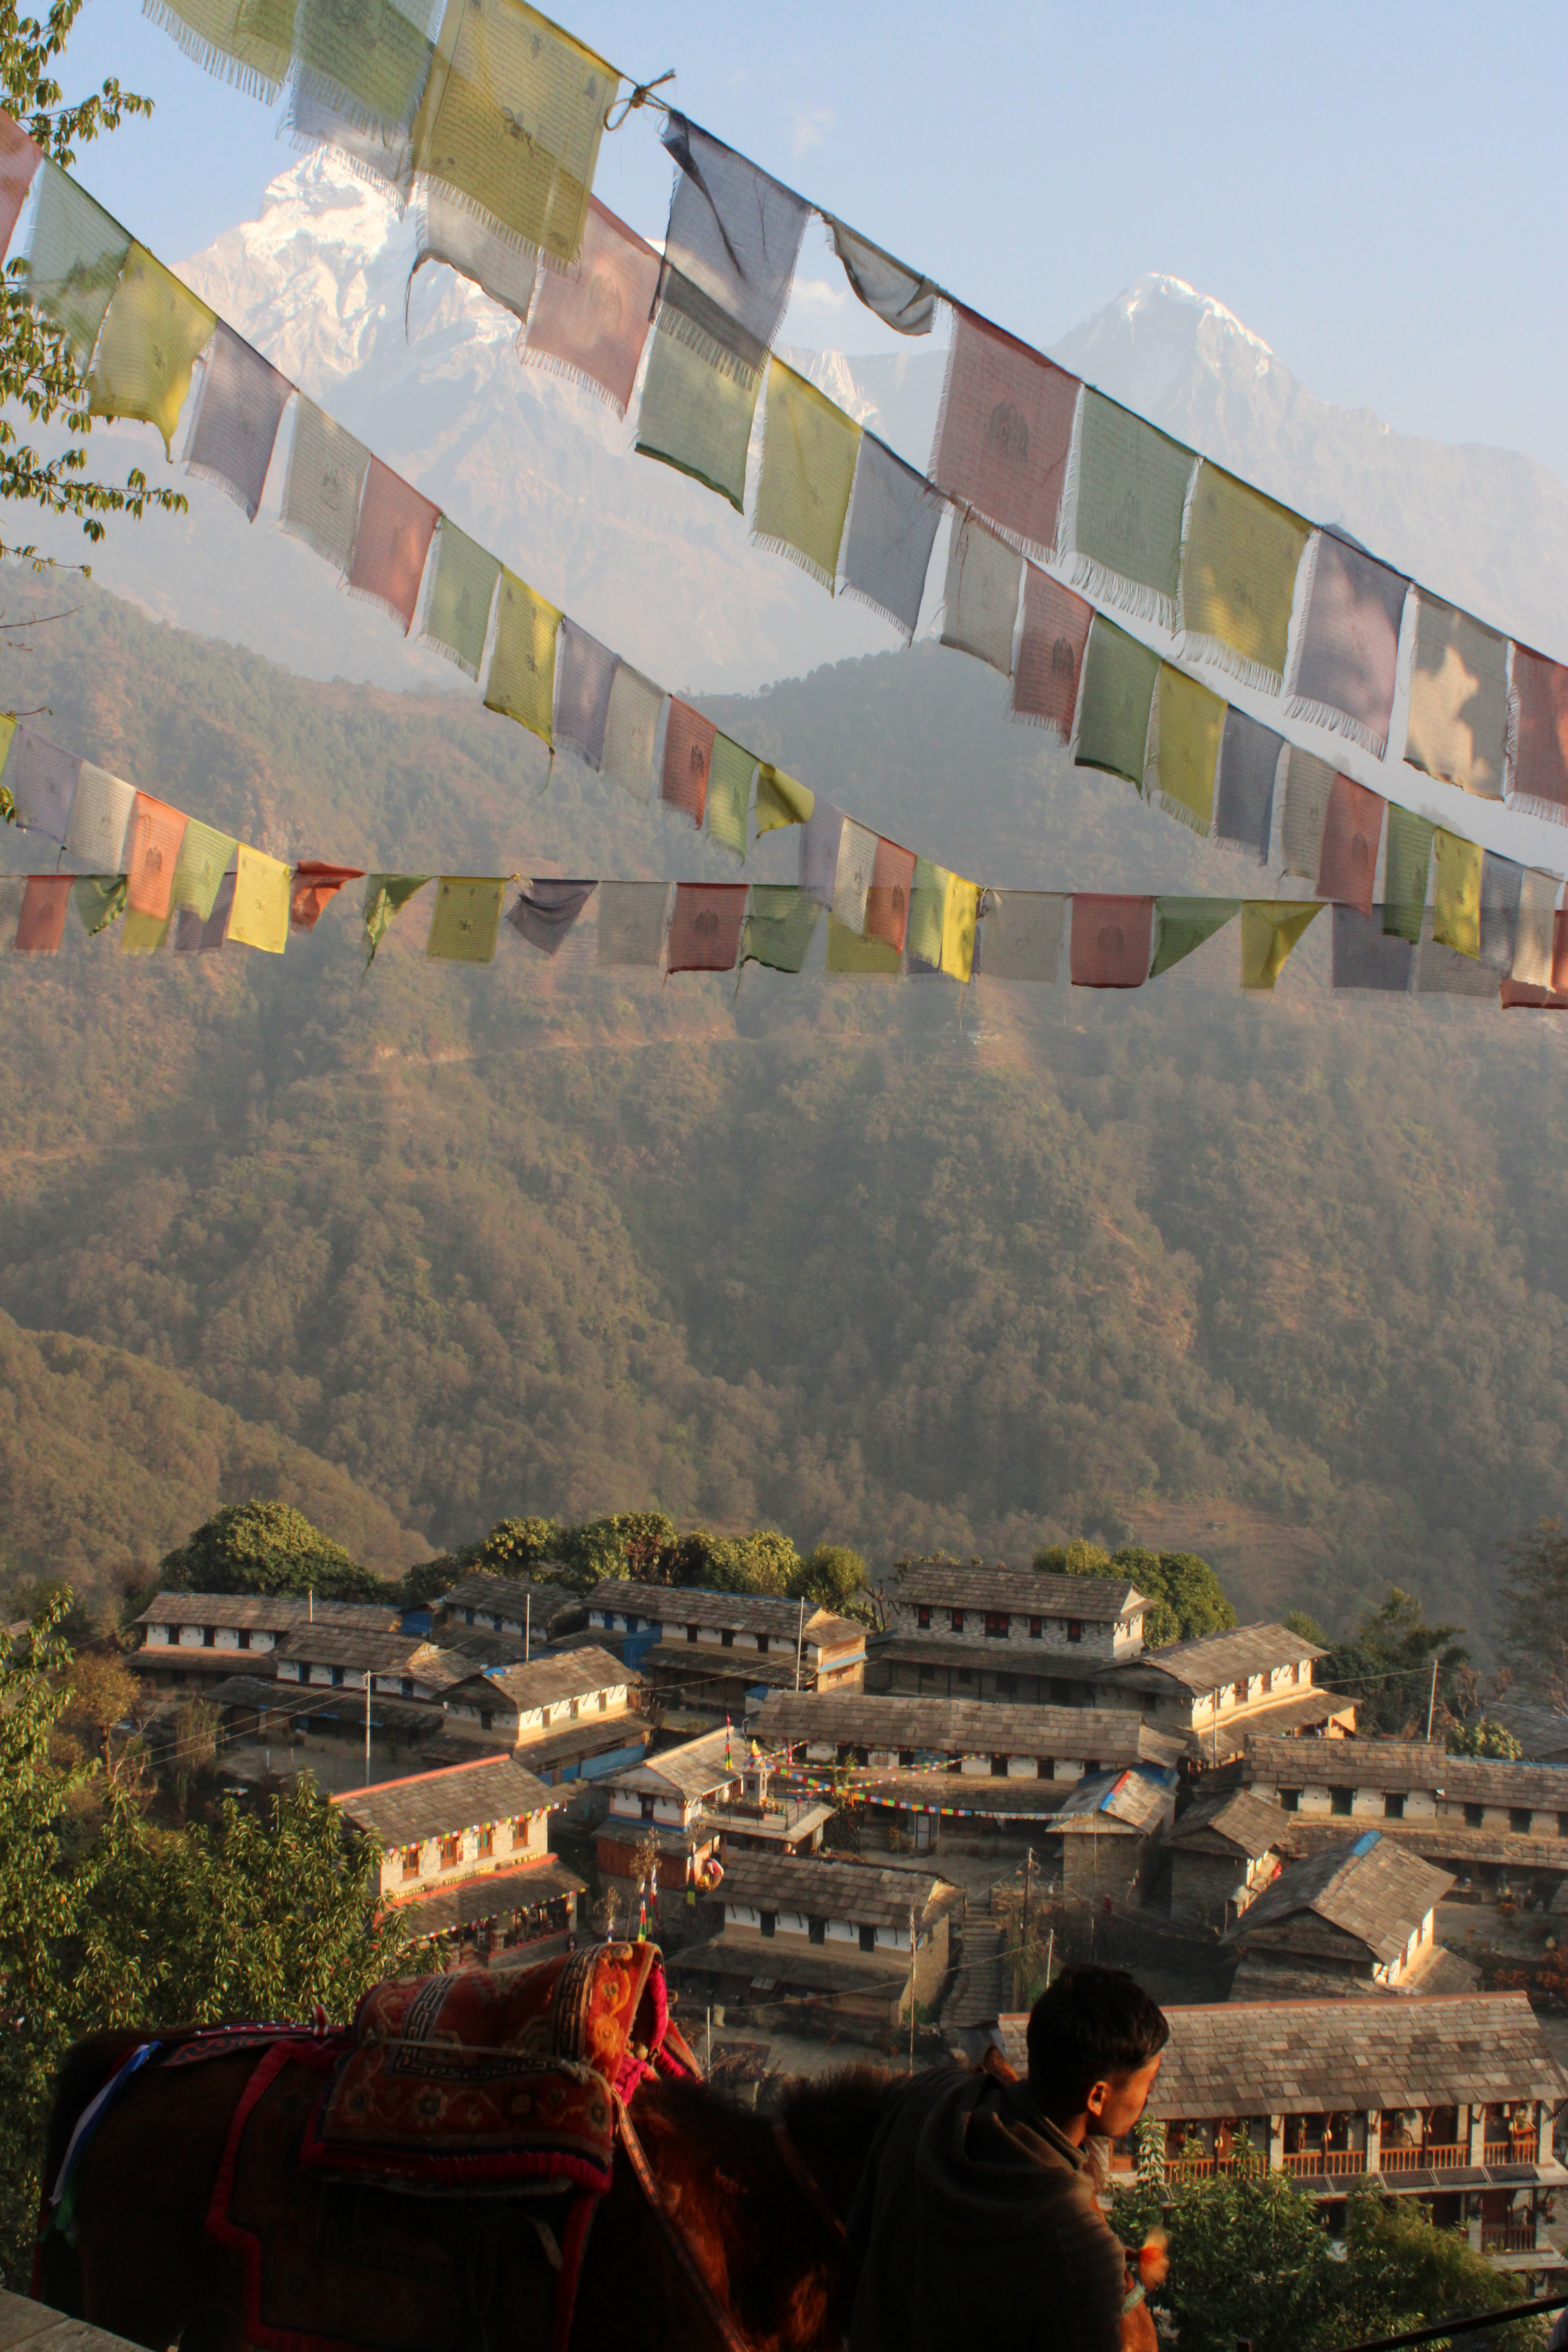
Teahouses – the next biggest expense are the Teahouses. We did this trek all by ourselves without a guide or porter so we had to enter the villages ourselves without a booking and reservation. Luckily, this was in late January so there was barely any tourists and plenty of rooms and options. There are two types of stays – cheap rooms but expensive foods and expensive room but cheap food options. For example, one our first night in Ghorepani, our room cost 500NRs but our dinner, tea, breakfast over all cost 3000NRs. Whereas our stay in Ghandruk was the opposite – room at 3000NRs (with breakfast) and food options at a much cheaper rates.
During the trek, one will find plenty of side-of-the-road vendors selling snacks, chocolates, tea, fruit, meals etc. The prices at these places are much more expensive (ie a small orange = 50NRs, a cup of tea = 100NRs, a glass of fresh orange juice = 500NRs, a snickers bar = 300NRs, a dairy chocolate bar = 500NRs) vs the prices in the city. I would HIGHLY HIGHLY recommend stocking up and buying snacks in the city before your trek. I took this advice from a couple we met in Indonesia and I am so glad I did it. Snacks were an important part of our trek – stopping and resting for a bit while refreshing ourselves with some well-deserved chocolate bar or chips was a life saver.
The Actual Trek Itself
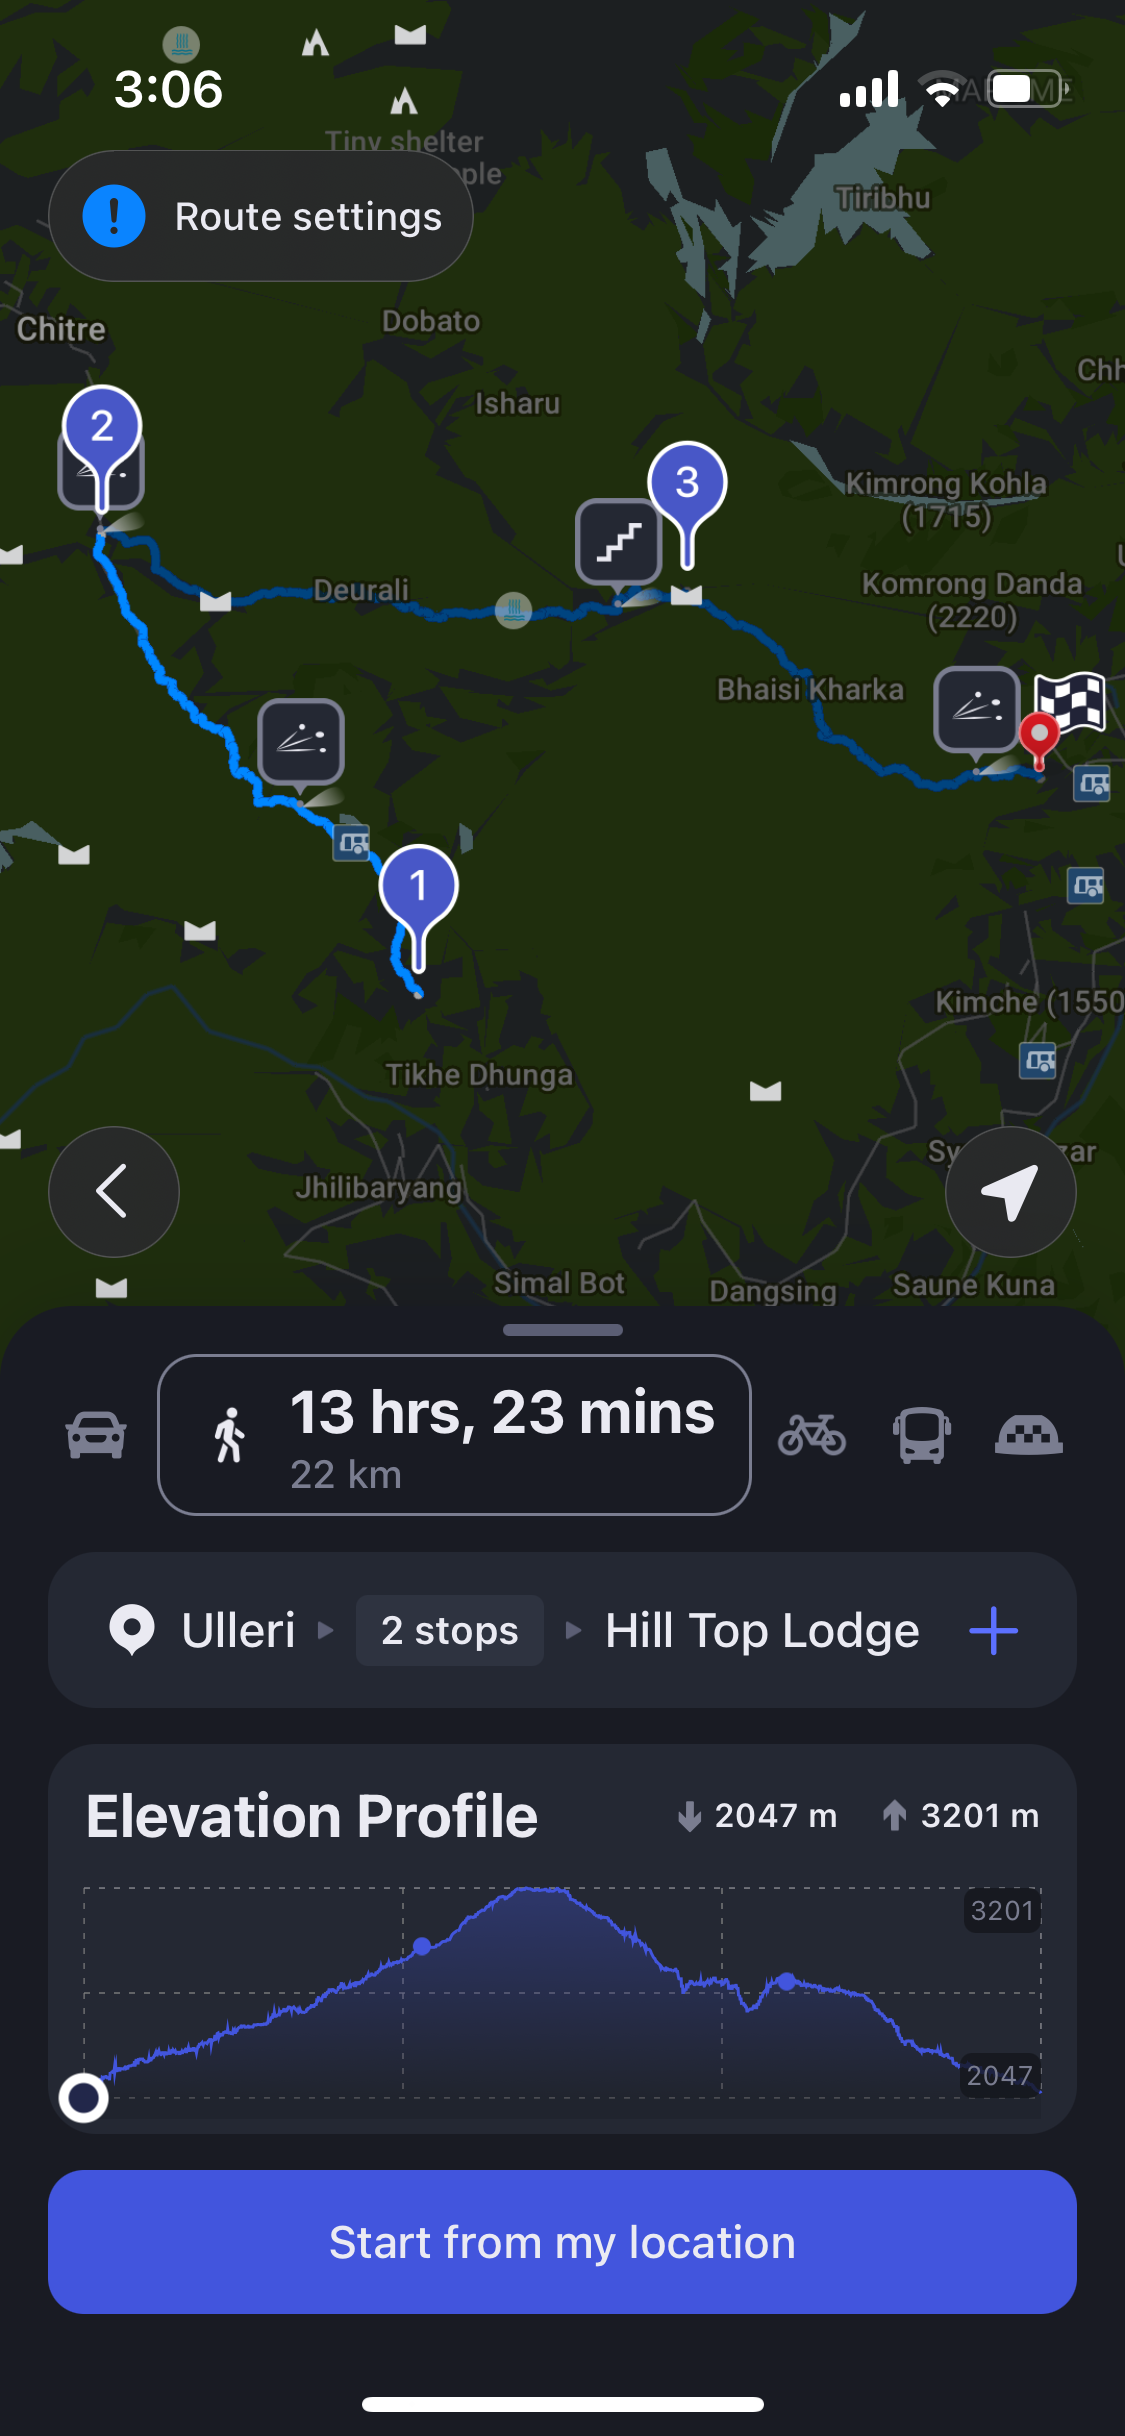
Since we skipped the first 1000m of elevation gain and 10km, I can’t say much of what the trek is actually like from Birethanti to Ulleri. What I can say is that the road we drove on is a dusty, dirt road not fit for any normal car. We drove through some streams and some waterfalls but nothing too crazy. There are many different paths, side trails – but we mostly did the main trails.
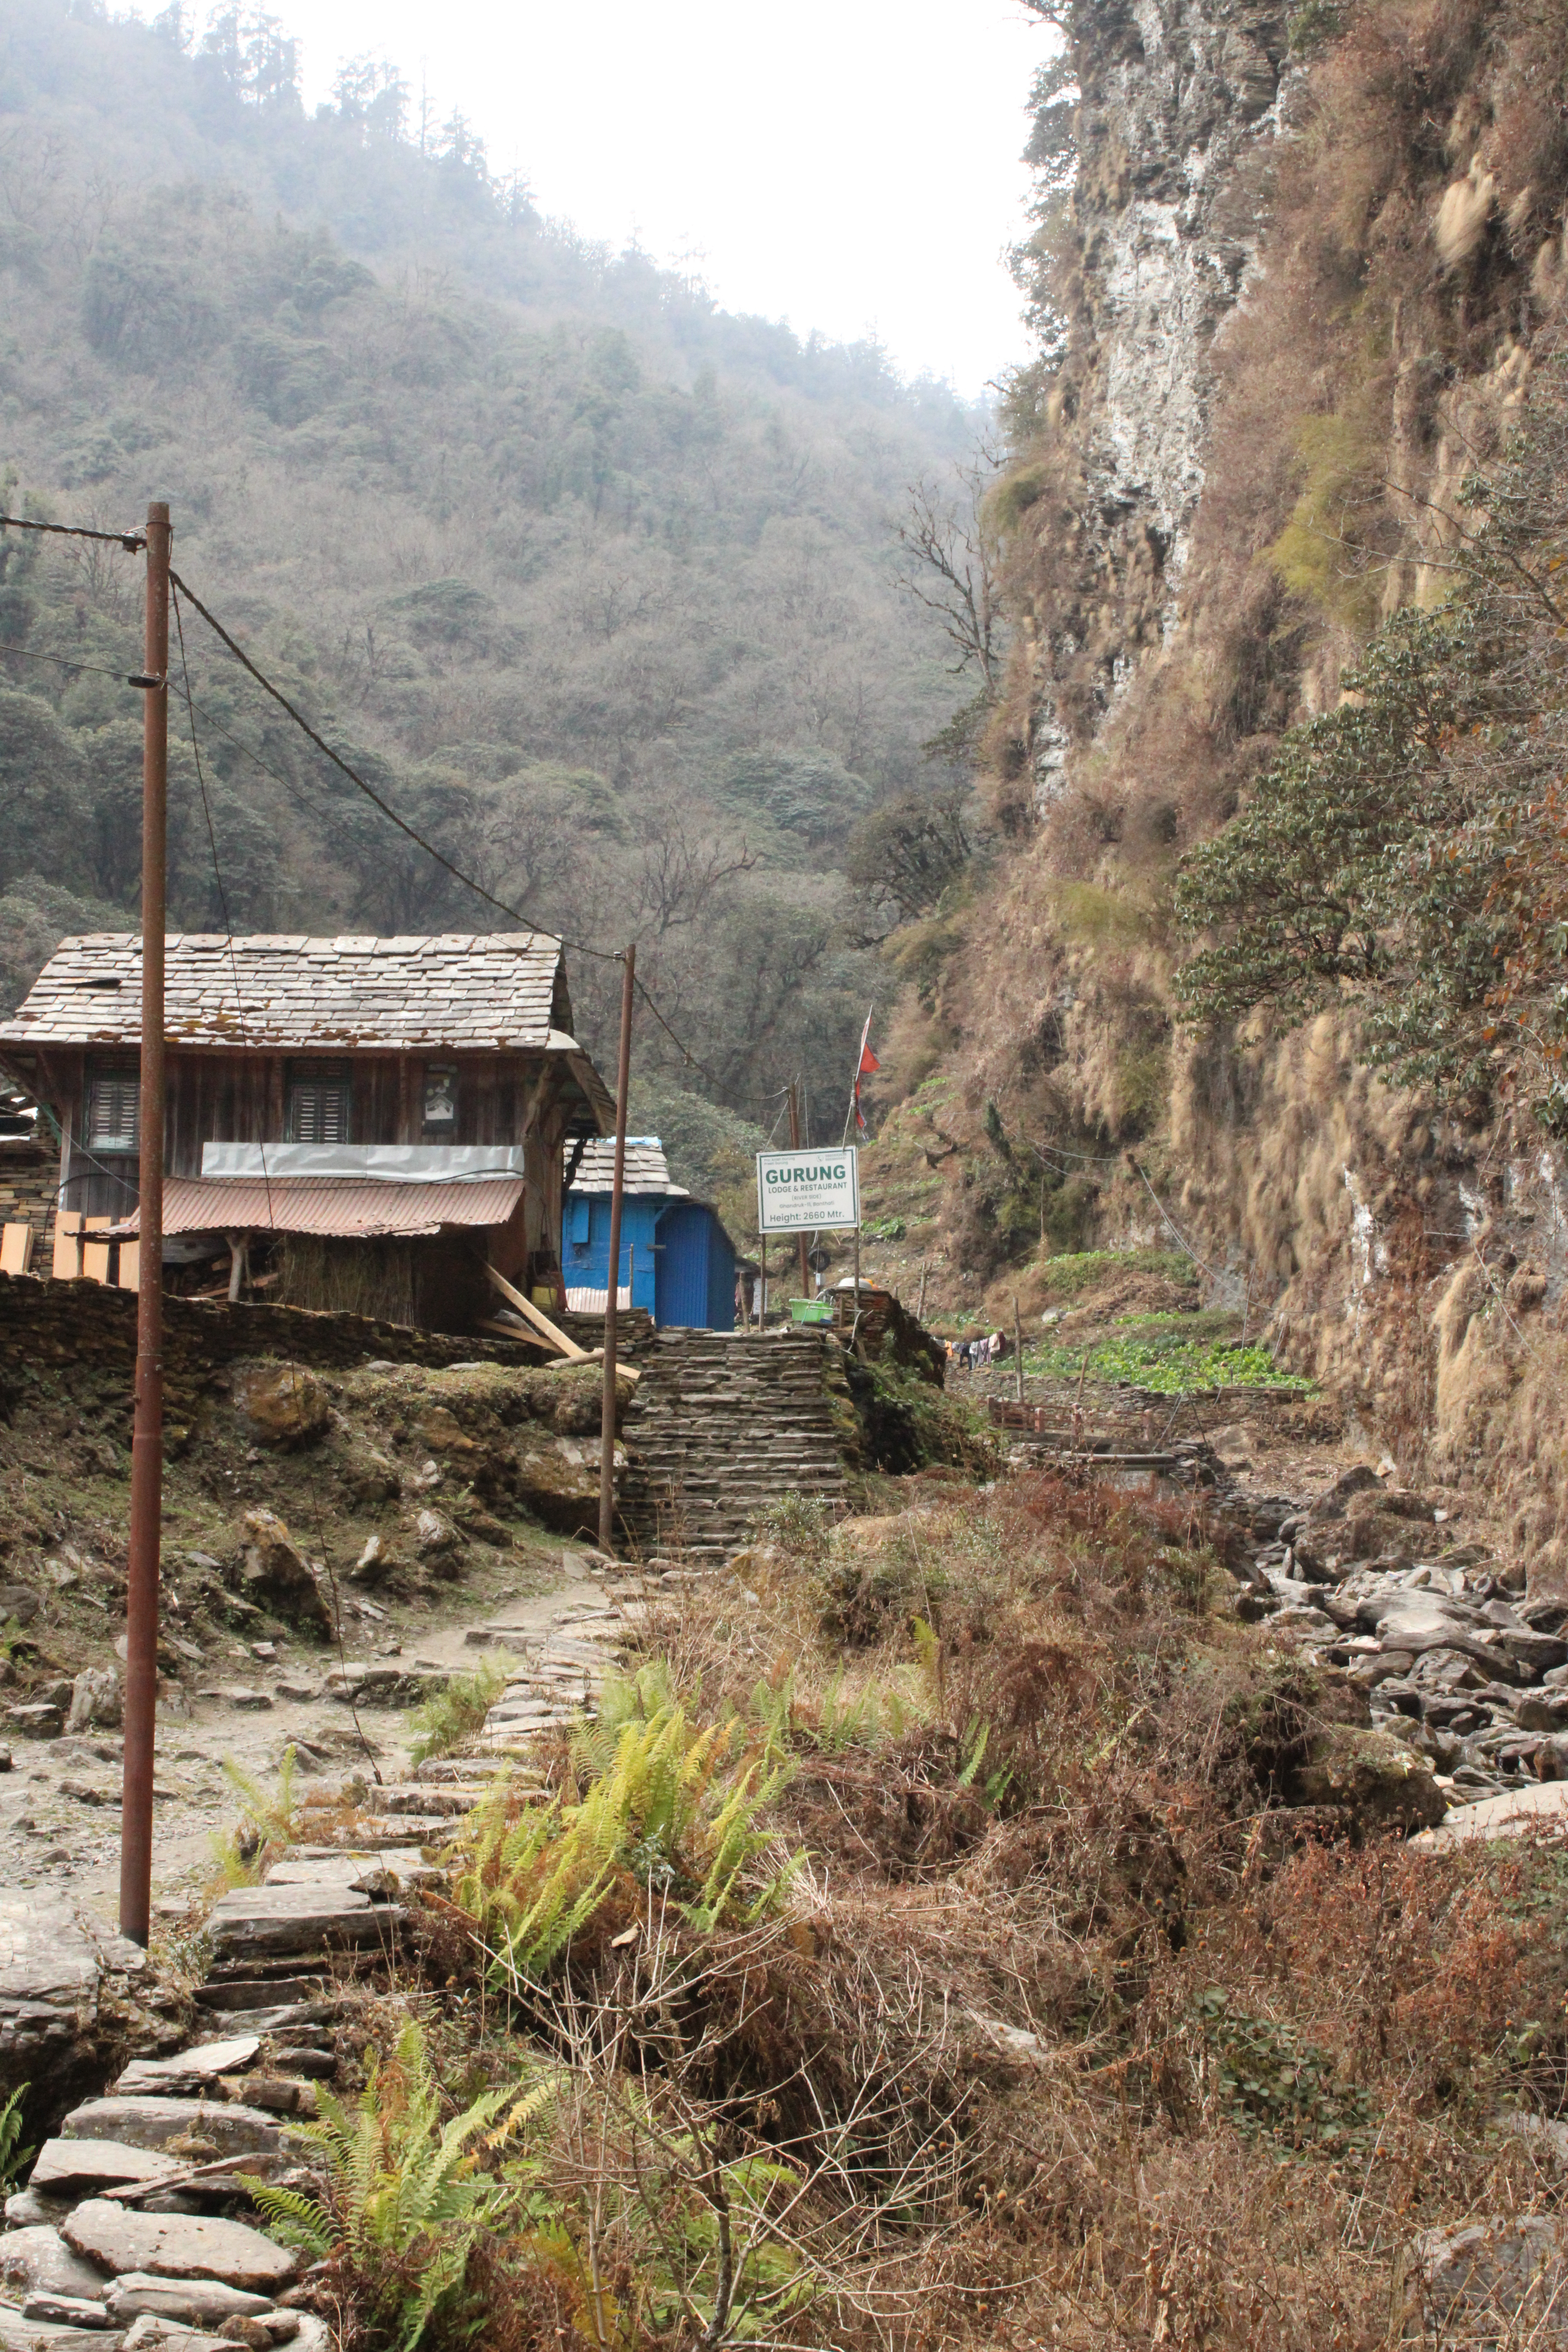
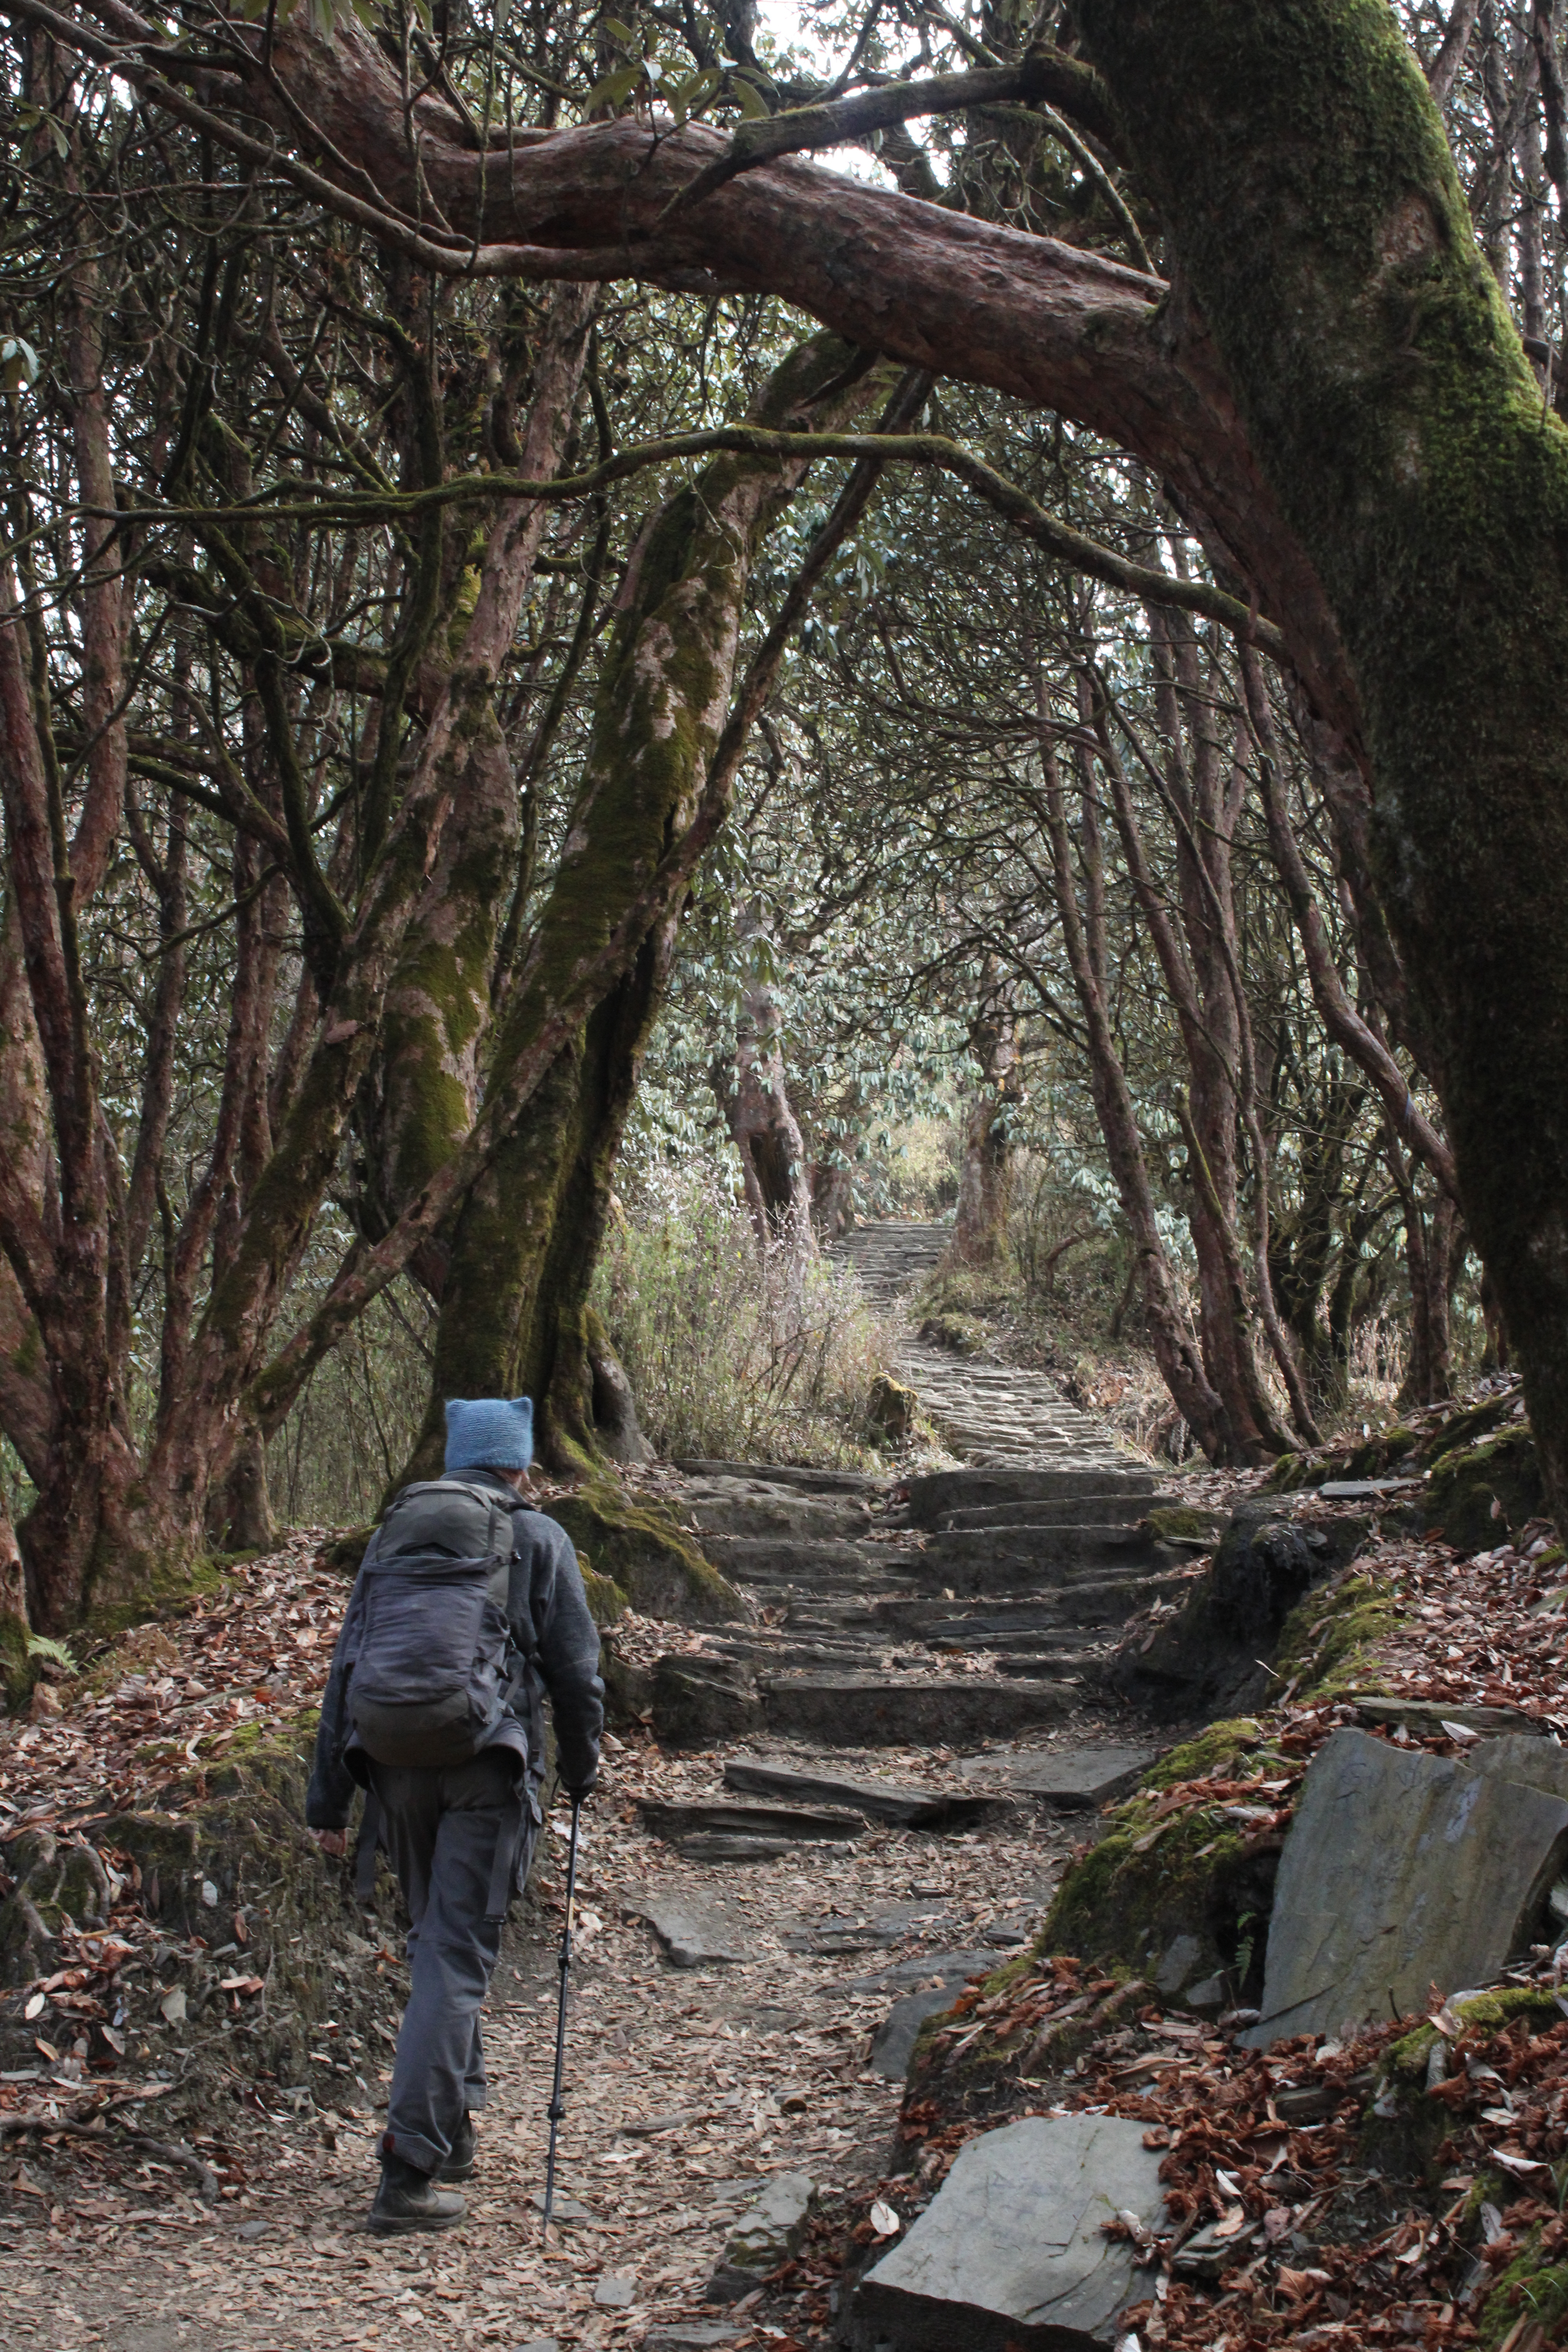
Starting in Ulleri, our path interchangeably intersected with the dirt road that the jeeps take. The road goes all the way to Banthanti and the jeeps stop there. After this, we no longer heard the roars and hums of jeeps in the mountain. As we ventured further into the ancient forests, a different sound took over. The sound of flowing water fills the air as we followed the trail upstream. We saw waterfalls, clear rocky pools and creeks. The trail itself is mainly made out of flat stone steps – a stone staircase into the mountains. Be prepared to familiarize yourself with these stone steps as you will see countless of them in the trail. There were several tea houses, some guesthouses along the way but for the most part it was just us and sweet old mother nature.
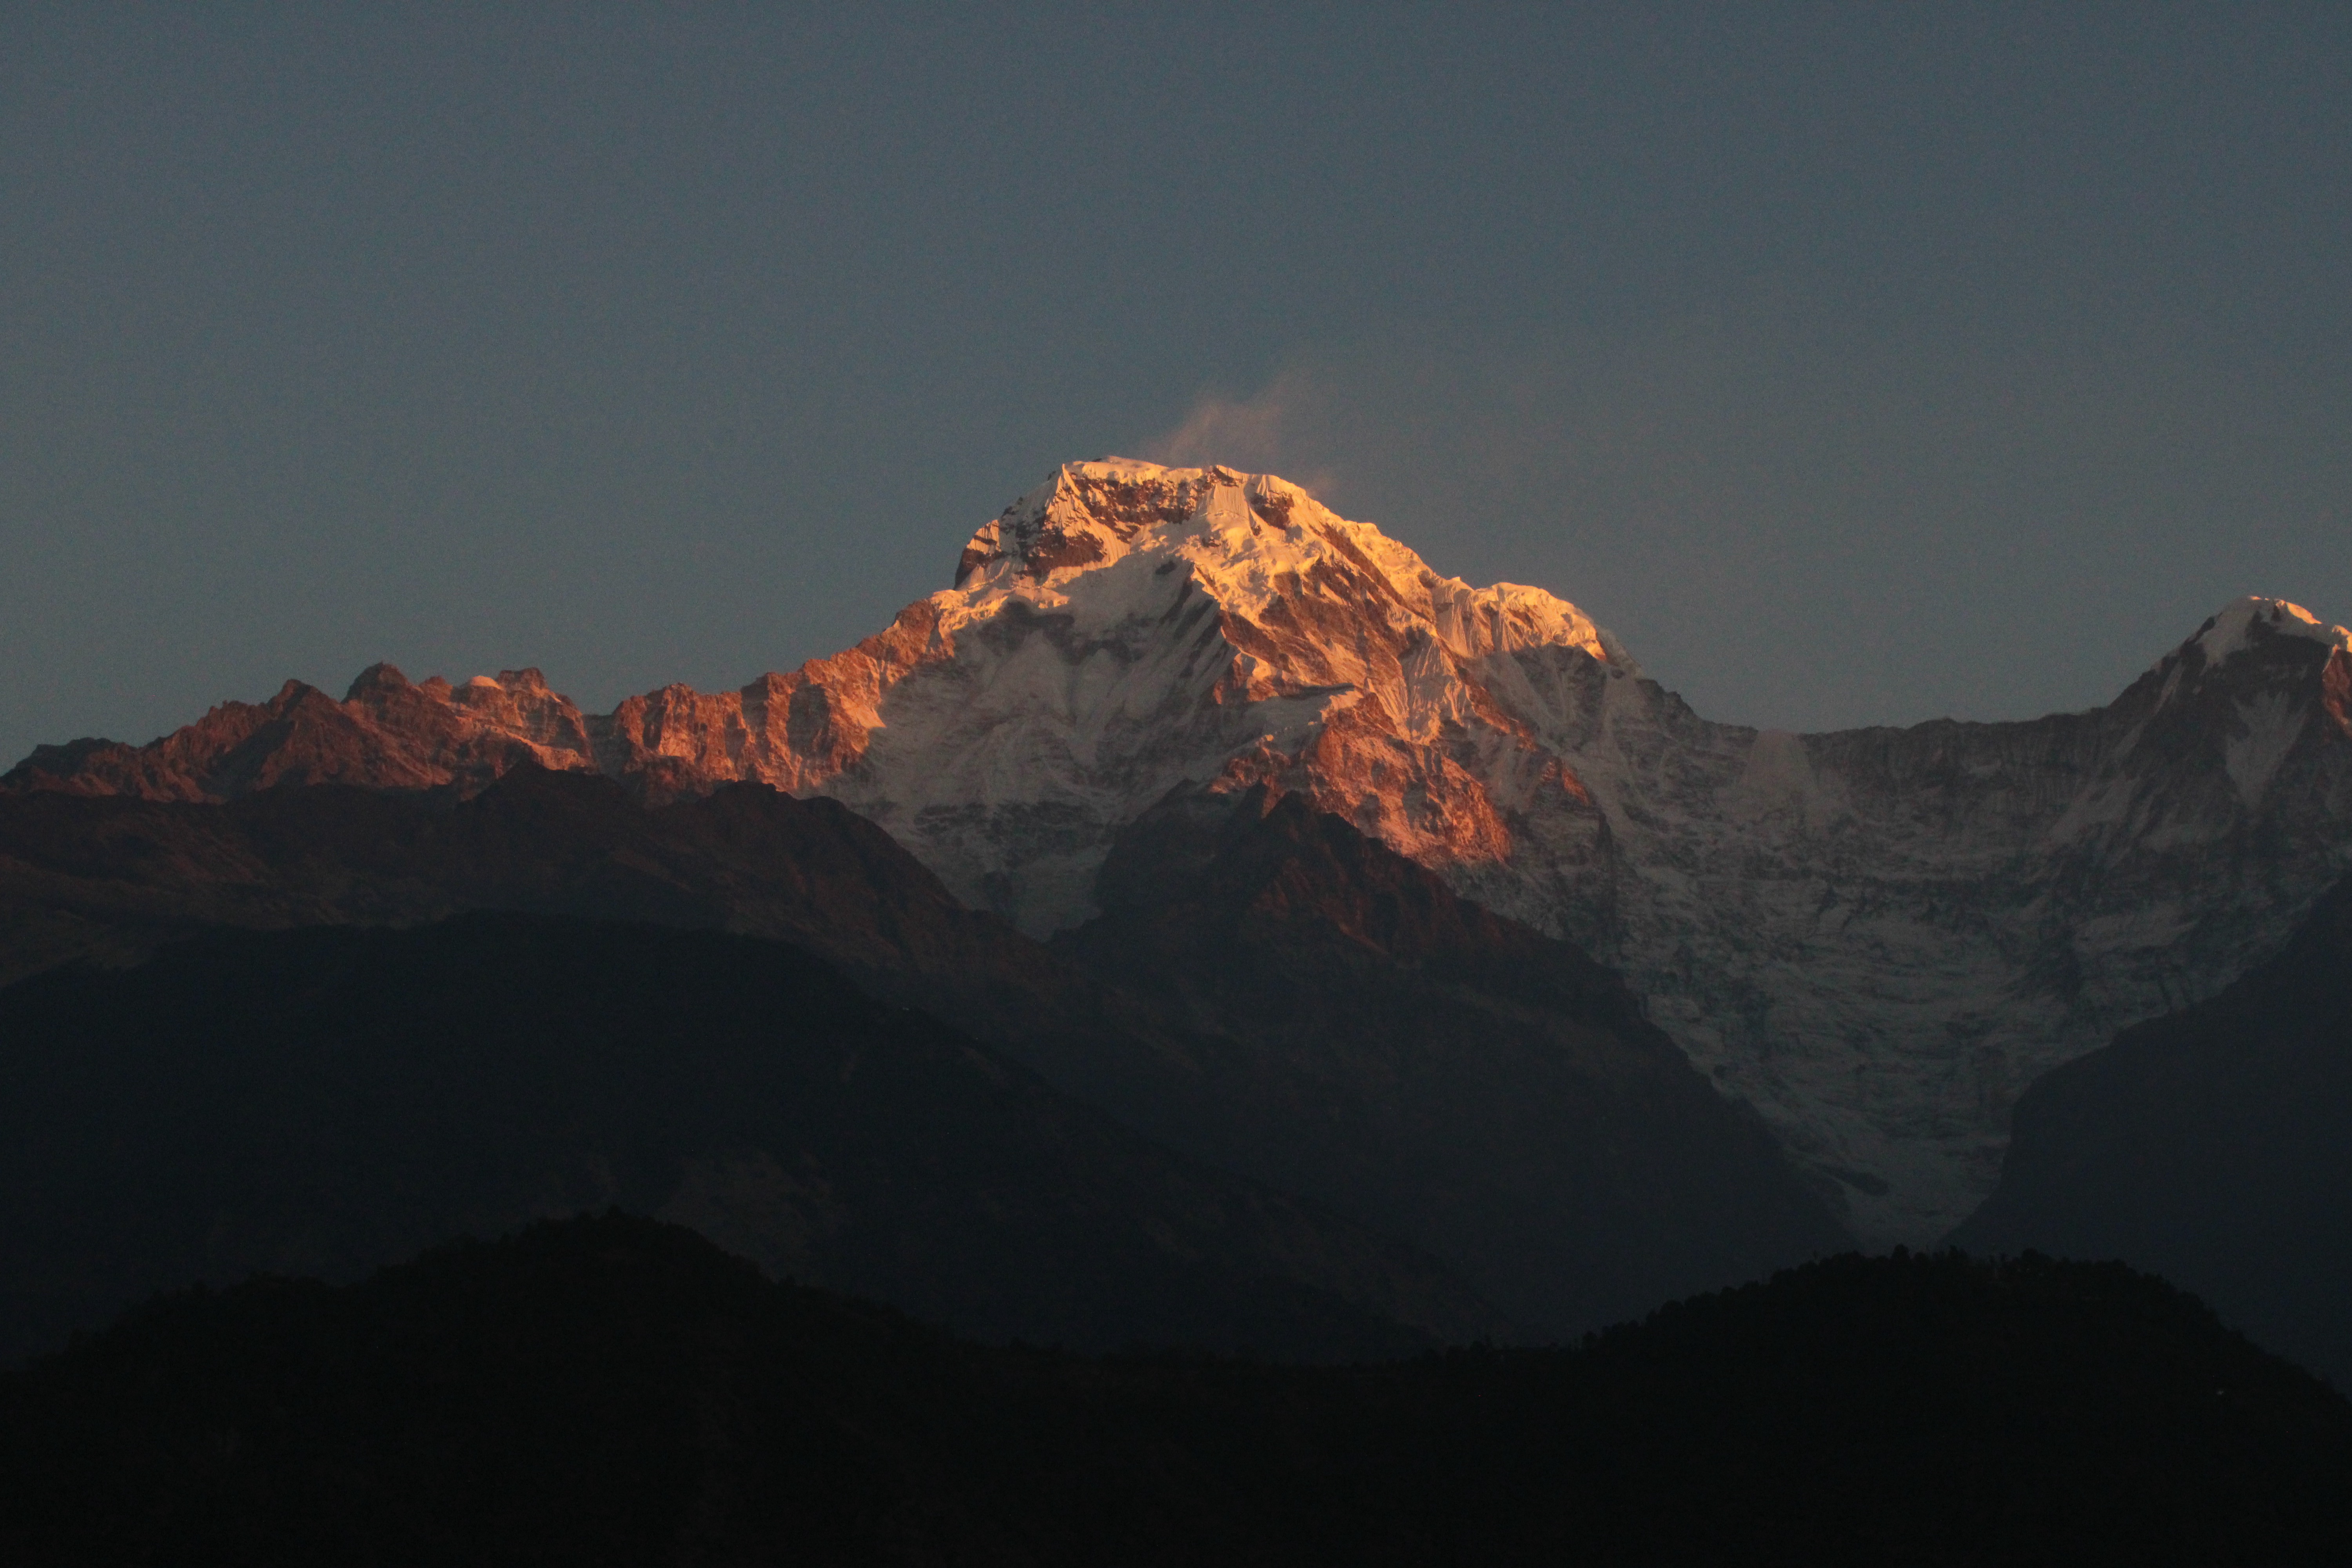
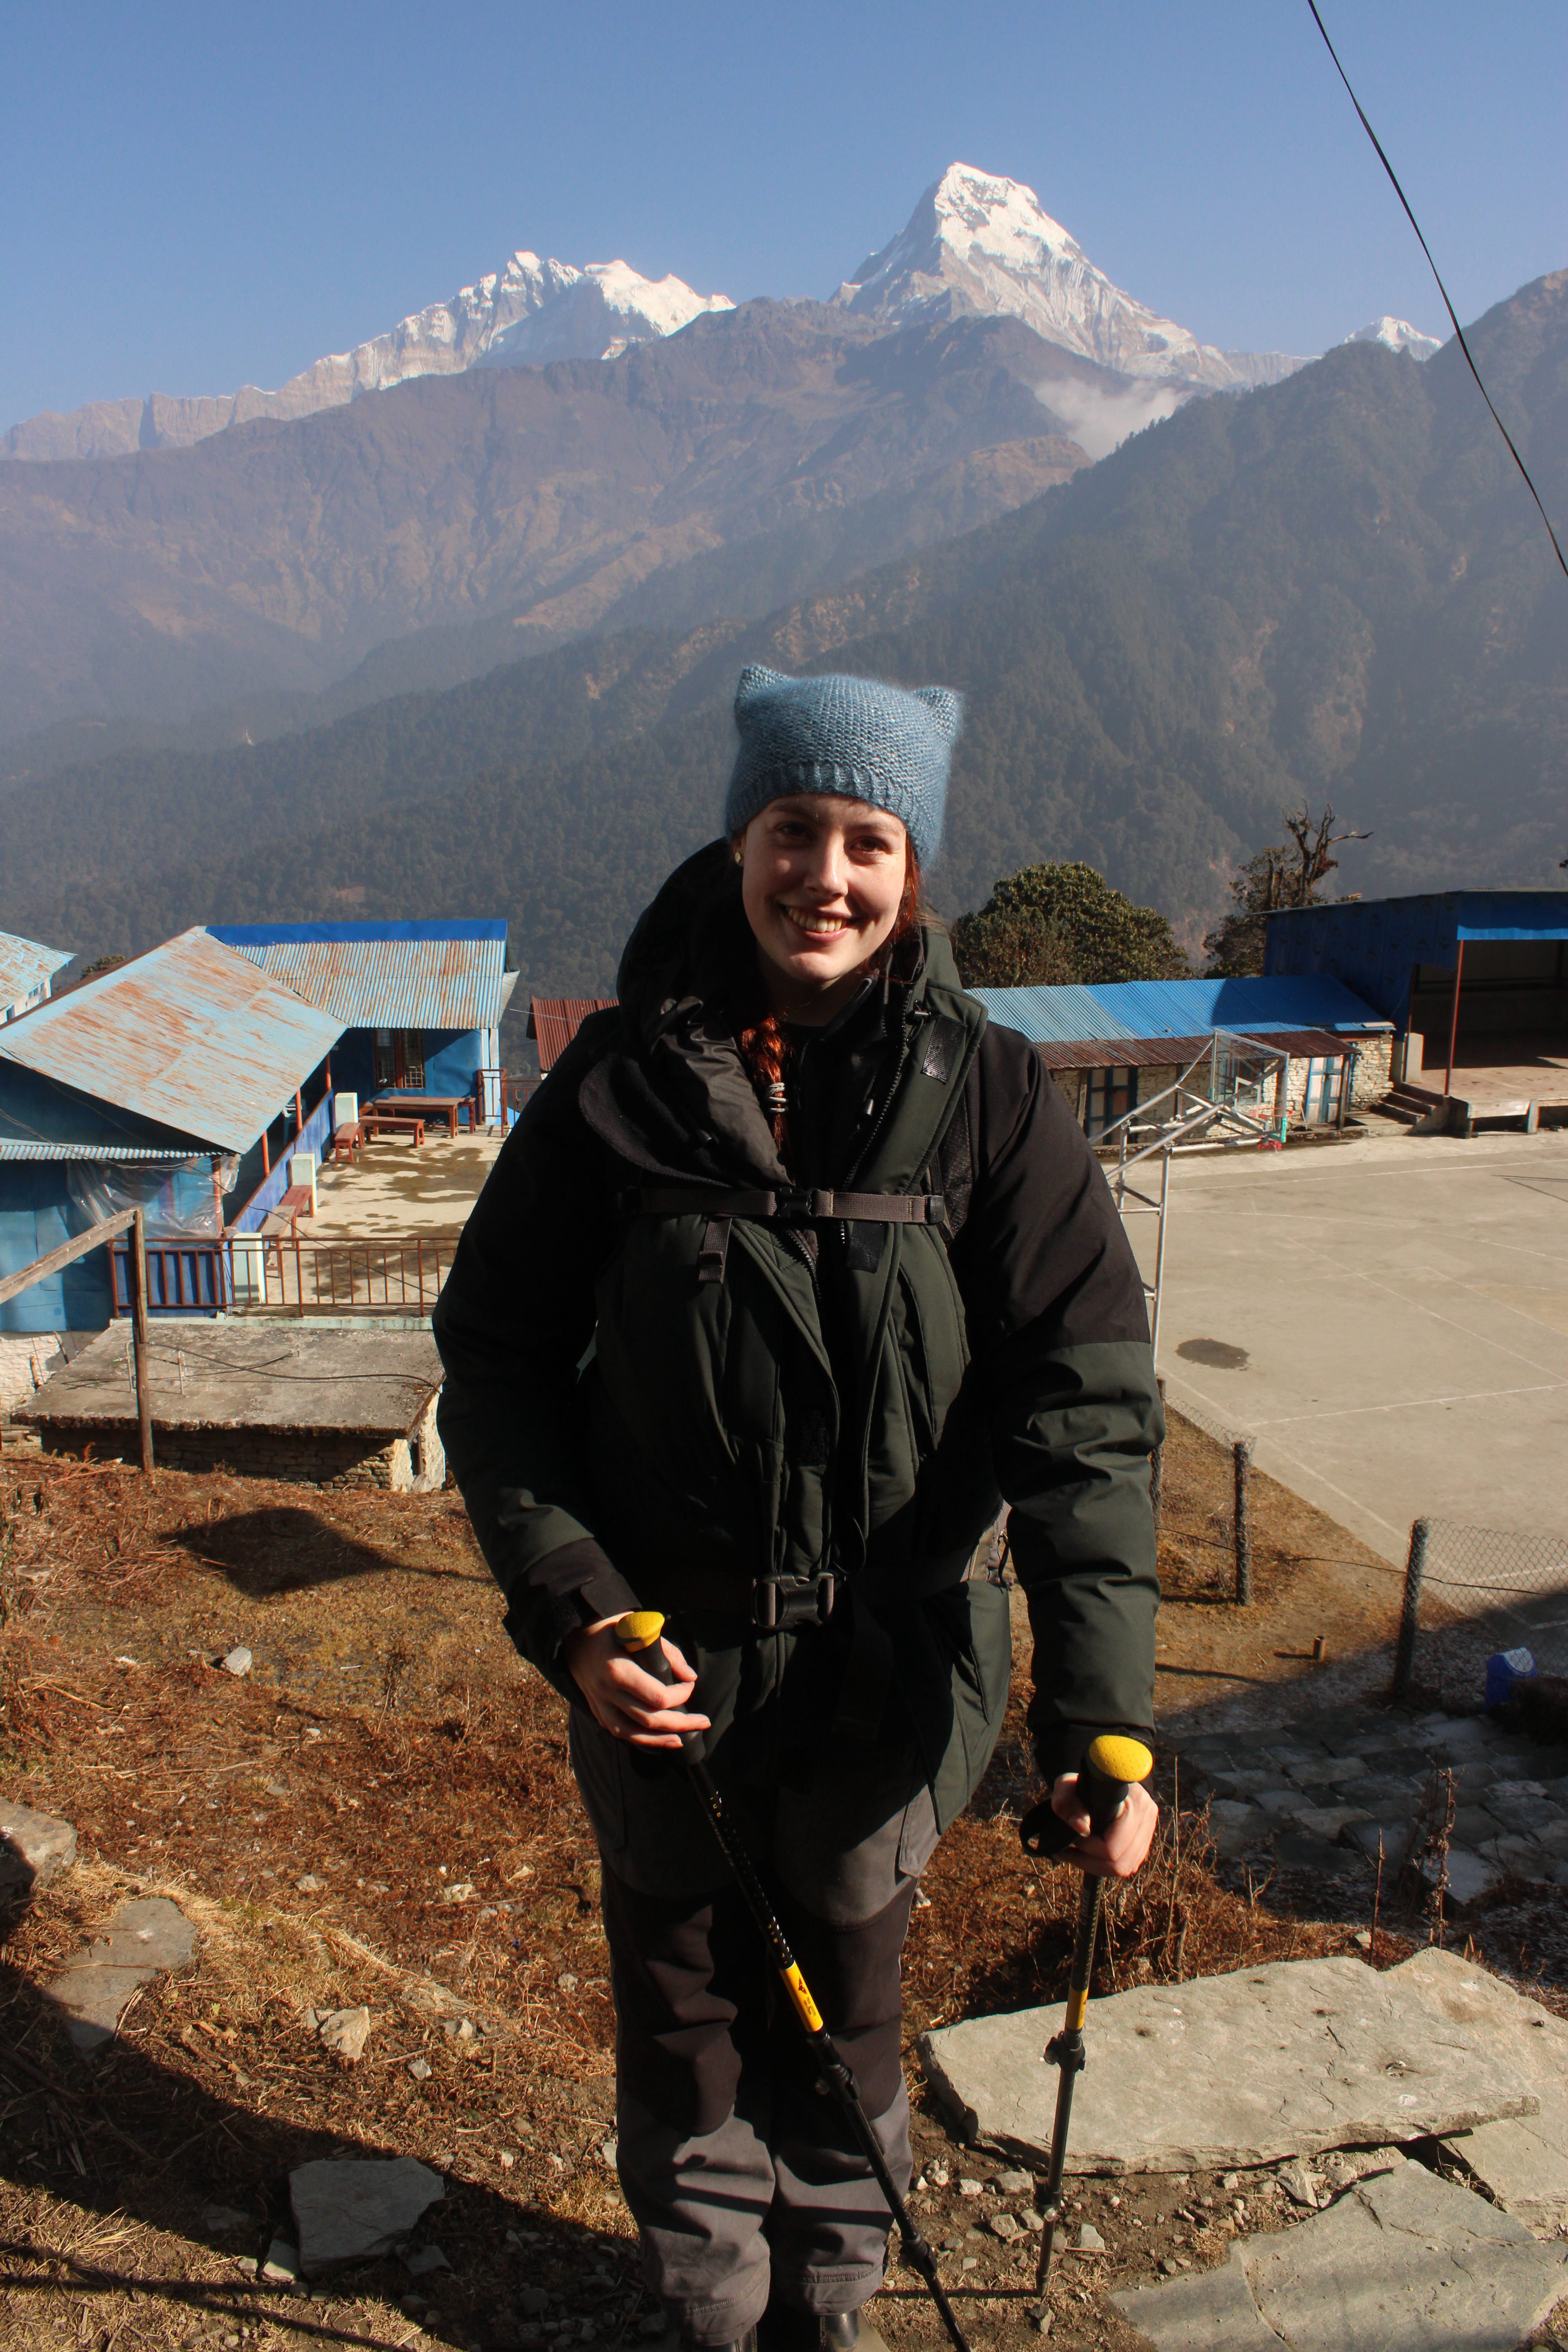
The views were not amazingly superb during our first day since it was a bit of a cold, grey, overcast day. The hike from Ulleri to Ghorepani is more or less hiking through the first layers of mountains – we were mostly in deep forest with not much of a view. It is a relentless uphill hiking so be prepared to take your time and gain some elevation. Arriving in Ghorepani and seeing the Himalayas for the first time is a well deserved reward at the end of a long day.
I would also HIGHLY HIGHLY recommend downloading the app Maps.me – its a free app with 10 maps free to download. Download the map for your trek and you’re set. It was invaluable to us during our trek and helped us track our progress and making sure we don’t get lost.
Its also recommended to use Whatsapp in Nepal as this is one of the go-to apps used by locals. You can research different hotels in the villages, message their whatsapp to try and book a room if it is busy.
It would also be a great idea to take out more than enough cash before you start your trek as there is NO atms in the mountain at all – especially in remote villages. Everything is cash only. However, we did find an atm in Ghandruk. Its just by the Black Drop coffee shop in town. It accepted our VISA card.
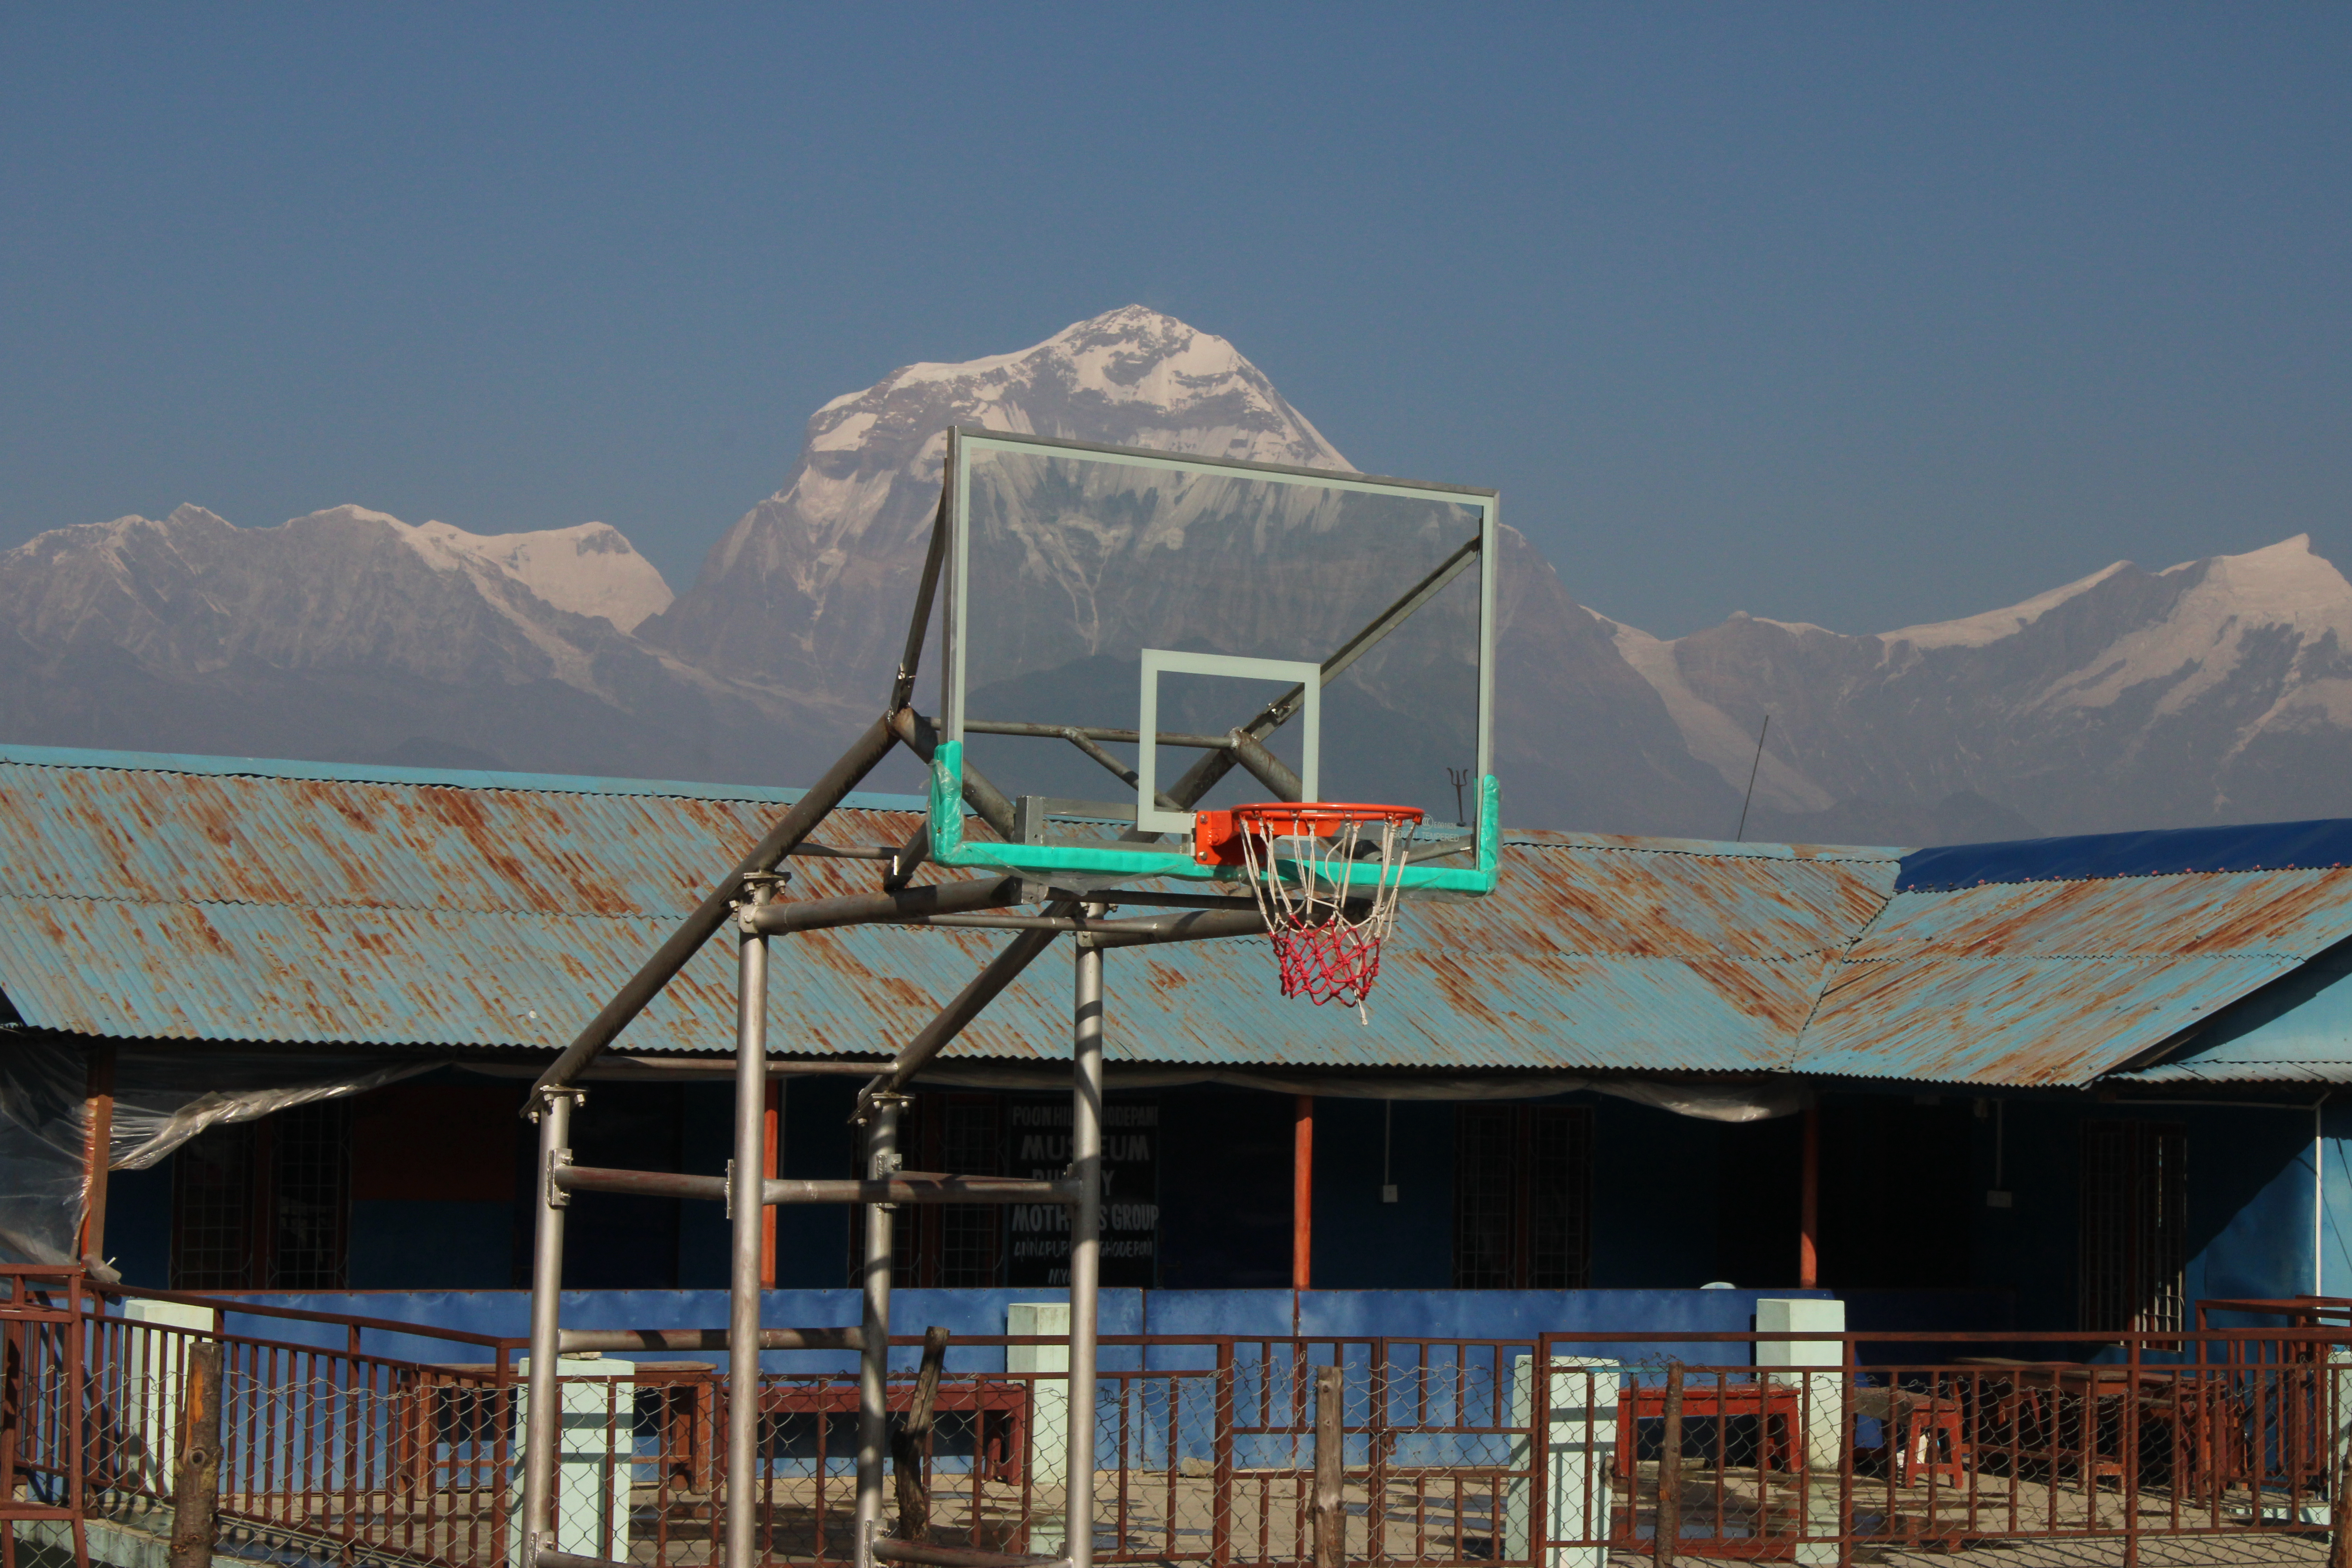
Ghorepani is where you can stop for the night and wake up for an early morning hike up to Poonhill. The views up here are said to be jaw dropping. It is an hour uphill hike from the town and another 30-45 minutes downhill back to town. Make sure you bring layers if you’re planning on enjoying the sunrise and the views for a while as it can get cold up there.
The trek from Ghorepani to Tadapani is another day full of beautiful views, more stone stairs and a guaranteed workout. I’d like to consider this part of the trek in three sections:
- Up
- Down
- Both
The first section is an uphill battle up to Deurali Pass. We climbed 600m over the course of 3km where we stopped for an afternoon tea on top of the ridge. The views here are breathtaking and you can clearly see Poonhill, a little bit of Ghandruk and an open view of the nearby giant towering behemoths.
The second section is a very nice, relaxing and is a relatively flat trek on the ridge where you can see the mountains consistently peeking through the trees. The trail turns into roots and dirt and we forgot about the stone steps for a while. In no time, we started our steep and long descent into the gorge losing over 800 meters of elevation- we followed a river downstream all the way through little villages and finally to the last section of the trek.
I’d consider the last section to start at Trekker’s Sanctuary Lodge. This is the final lodge before the village of Tadapani, at the edge of one mountain and overlooking the misty valleys of the area. Here, we went down a very steep, switchback stone stair case all the way down to the bottom of another river gorge. The hard work does not end here as our final task is going up another group of very steep, switchback stone stair cases. This last section is the final hurdle before reaching the quaint village of Tadapani.
The last leg of the journey is on the third day. Starting from Tadapani, we made our way towards Ghandruk. The hike itself was not bad – only a mere 3 hours for the day. A gradual descent into another gorge following another river downstream through yet again some small villages and houses. On this side of the mountains we noticed there was less rhododendron trees and more pine trees but still the same ancient moss covering it all. The views through the trek is something we’ve seen before – forests, rocks, river, creek, waterfall and moss. However, the highlight is reaching Ghandruk and seeing the magnificent views all around the villages. Id highly recommend making your way down to see the “hidden” village on the northside of the town.
After our stay in Ghandruk we had two options: hike the rest of the way down towards Birethanti or take a drive down. There are paths that avoid the main dusty road but we ultimately decided to take a jeep down. It cost us 5000NRs which we shared with two other trekkers.
For this trek, I’d personally rank it as moderate. The difficulty isn’t with the technicality of the trails – its with the amount of distance covered and altitude gained. It’s still quite a ways and some days we did over 1000 meters of altitude change. We also did this trek in the winter which has its pros and cons – the weather is clear, the trails are empty and there are many options for rooms. However we also found it very cold at night and we had to pack with us more layers which can be very limiting. If I were to come back, I’d come back during the fall when the weather is pleasant or spring when the rhododendrons cover the valley.